Tuesday, February 28, 2006

Cold Hands -- Means I'm Miserable

I don't know about everyone else because I haven't been inside of other people's skin... but for some reason they don't seem to suffer as badly when their hands get cold. I mean I cannot rince vegetables under cold water because it causes the bones in my arms to ache. Shooting pains go up my arms. It's really bad.

When the weather is very cold, I can layer up the clothes but actually hate wearing gloves because my hands actually get colder. Separating my fingers from each other into their own little tubes does not help them stay warm. But I haven't found mittens in stores that I actually like or that are actually warm.

But I may have found a solution. Since I started knitting and surfing the internet for other knitter's blogs and knitting patterns, I have discovered something called Thrummed Mittens. I have ordered sock yarn (much to my husband's dismay) and plan to make some socks but I'm thinking a couple of pairs of mittens would not be a bad investment in my time and money. I've seen roving in little bags at Michaels. I'm thinking... This could be a dangerous thing... I might have found my calling.

Friday, February 24, 2006

Shawl for Elder in Owl's Nest

I am making a shawl for our next elder (Chessie). It is in in Opal Rainforest Owl Yarn. This is a sock yarn and will make a nice, light-weight (for-appearances-only) shawl. In other words, she will be able to wear it in any weather and while it is made of wool, it should not be hot at all.

It is in Stockinette stitch (for the most part) and the colorway is remarkablely close to an owl's feather. In the picture you can see an owl feather laying atop the shawl as completed so far.

Green Sock Adventures

I still refused to give up on making a pair of socks. I picked up some worsted weight green wool from my mom's stash and started this project


On down to the Heel.
This picture shows the first few inches


You can also see in this picture how I got confused on one round and knitted background making a ridge on the back of the sock. A learning experience to be sure.

Here is the next picture of the heel turning: I forgot to do a regular knit every other row so my turn is just too short. Again, however, I am learning.


What's interesting to me is how easy it was to pick up the stitches after making a heel flap. I read the directions. I had to put the thing down and walk away for about an hour then come back and just proceed on faith. Honestly, it does not seem like it's going to work until you just do it.


Here you can see where I turned the corner and headed down to the toes.

I did finish this sock and slipped it on my foot. It fits but is really too small. The heel is too narrow and the cuff too loose. Kitchener's worked great for the toes. But I have learned a great deal and my next sock is going to be much better.

I'm using the rest of the ball to make another rune bag (or perhaps a tarot bag) because to me it is just too darned heavy for a sock. This weight might work well for a slipper, however.

I have been studying store bought socks and marvel at the thinness of the yarns.

Pictures of Rune Bags


Here are pictures of the rune bag completed.

Thursday, February 09, 2006

Finished a small drawstring bag

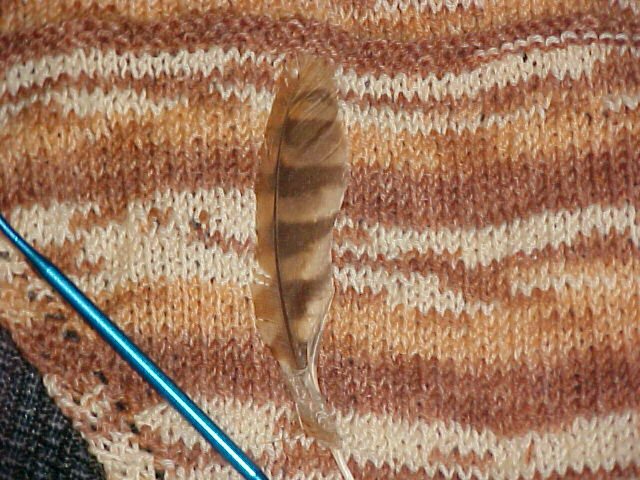
Okay, I was supposed to be trying to knit socks for DH. I got frustrated. My mother warned me that black yarn is very hard to work with when you are trying to learn new techniques. You can't see the darned stitches!

So, I picked up some lighter colored self-striping yarn at Ben Franklin's last week and started making a pair of socks for myself. But there was something weird and loosey-goosey with the cast-on. So I ripped it out. I started over. It looked pretty and lacy but not the way I want the tops of my socks to be. So, I ripped it out again.

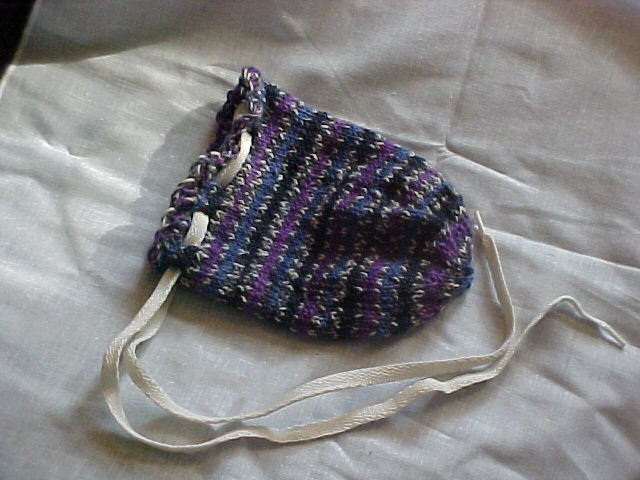
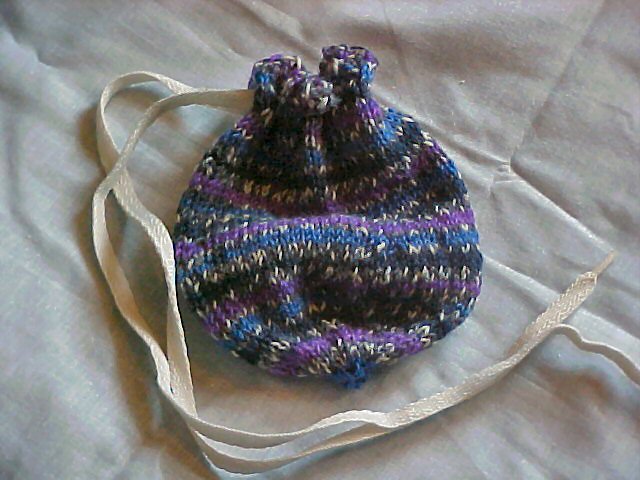
Then DH mentioned that he was almost finished making the rune staves for a friend of ours and wondered how hard it would be for me to make him a little bag to carry them in. I immediately picked up the double-pointed needles (size 3, BTW) and cast on 72 with the self-striping sock yarn. Still loose and sort of lacy, but for this -- pretty irrelevant. I did four rounds and got off track with the ribbing so I sort of had a bit of a seed stitch thing going... anyway, in the fourth round every 6th stitch I did a yarn over to create a nice neat hole.

I'm thinking ahead here, see, and know I will need a draw string to close the bag and I'm making the holes as I go around.

Then it was on to the rest of the little bag. The staves are three inches long, so the whole bag is about 5 inches from top to bottom. When I got down near to where I wanted the bottom to be, I decreased by knitting two together every six stitches. Then a whole round, then two together every five, a whole round, and two together every four, etc. Eventually, I was down to three stitches on each needle.

Here I did something bizarre and strange and completely mad... but it worked! It also made for a very strong bottom on this bag. I turned the bag so the needle with the working yarn hanging down was directly across from me by farthest away and the working yarn was a the end (like when making I cord). I took the needle directly in front of me and slipped one stitch onto the fifth needle. Then I went to the needle directly across from it (farthest from me) and slipped a stitch onto the fifth needle. I went back and forth between the two needles alternating stitches until all the stitches from two needles were on one needle. Then I gave the work a quarter turn and did the same to the other two needles. Down to two needles.

I knit a row on each, then did the same thing as above -- alternating stitches to combine to one needle. Then I decreased until I had two stitches and made a little short I-cord. THEN I broke the yarn and got out a small crochet hook, pushed it through the bottom of the bag, hooked the I cord and yanked it to the inside of the bag. Voila! I'm done.

Picture is here.